Consentire l'accesso a un file o una cartella che mostra un avviso di sicurezza Accesso negato
Se ricevi un avviso Sicurezza del sito web di accesso negato quando tenti di accedere a una parte del tuo sito, dovrai aggiungerlo all'elenco Consenti percorsi URL nelle impostazioni del firewall di sicurezza del sito web.
- Vai alla pagina dei prodotti di GoDaddy.
- In Sicurezza e backup del sito web, accanto all'account Sicurezza del sito web che desideri gestire, seleziona Gestisci .
- In Firewall , seleziona Dettagli .
- Seleziona Impostazioni.
- Seleziona Controllo accessi .
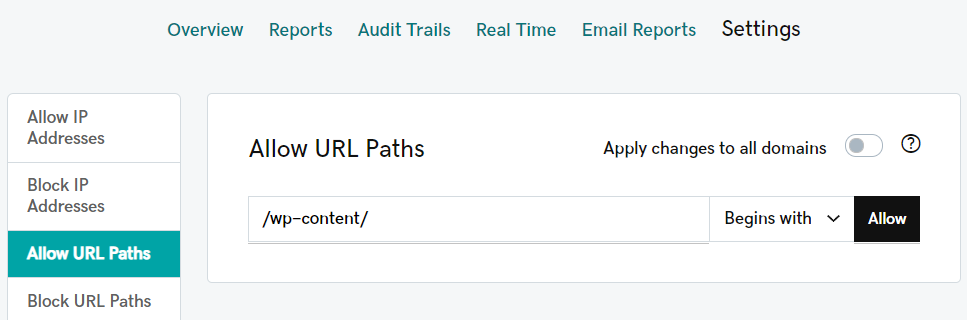
- Seleziona Consenti percorsi URL .
- Digita il percorso nella casella di testo, quindi seleziona se desideri consentire l'accesso all'intera cartella e a tutte le sottocartelle o consentire solo l'accesso a una cartella o un file specifico.
Nota: non puoi aggiungere all'elenco dei percorsi consentiti percorsi che includono "admin" come /admin /, /administrator /o /wp-admin /.
- Per consentire l'accesso a un'intera cartella, inclusi tutti i file e tutte le sottocartelle, digita il percorso e seleziona Inizia con dal menu a discesa. Ad esempio, se vuoi consentire l'accesso a/wp-content/images e wp-content/videos, digita/wp-content/.
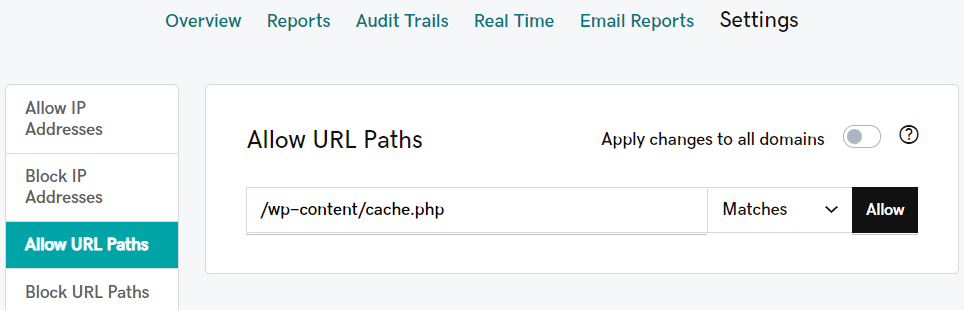
- Per consentire l'accesso a una singola cartella come /wp-content /, digita il percorso e seleziona Corrispondenze dal menu a discesa. Includi il nome del file se vuoi consentire l'accesso a un solo file in una cartella come /wp-content/cache.php.
- Seleziona Consenti .