Quick Start Guide: GoDaddy Smart Terminal Pro
Review basic setup instructions for your GoDaddy Smart Terminal Pro. For additional details, please check out our full setup guide.
| Step 1 |
|---|
 |
|
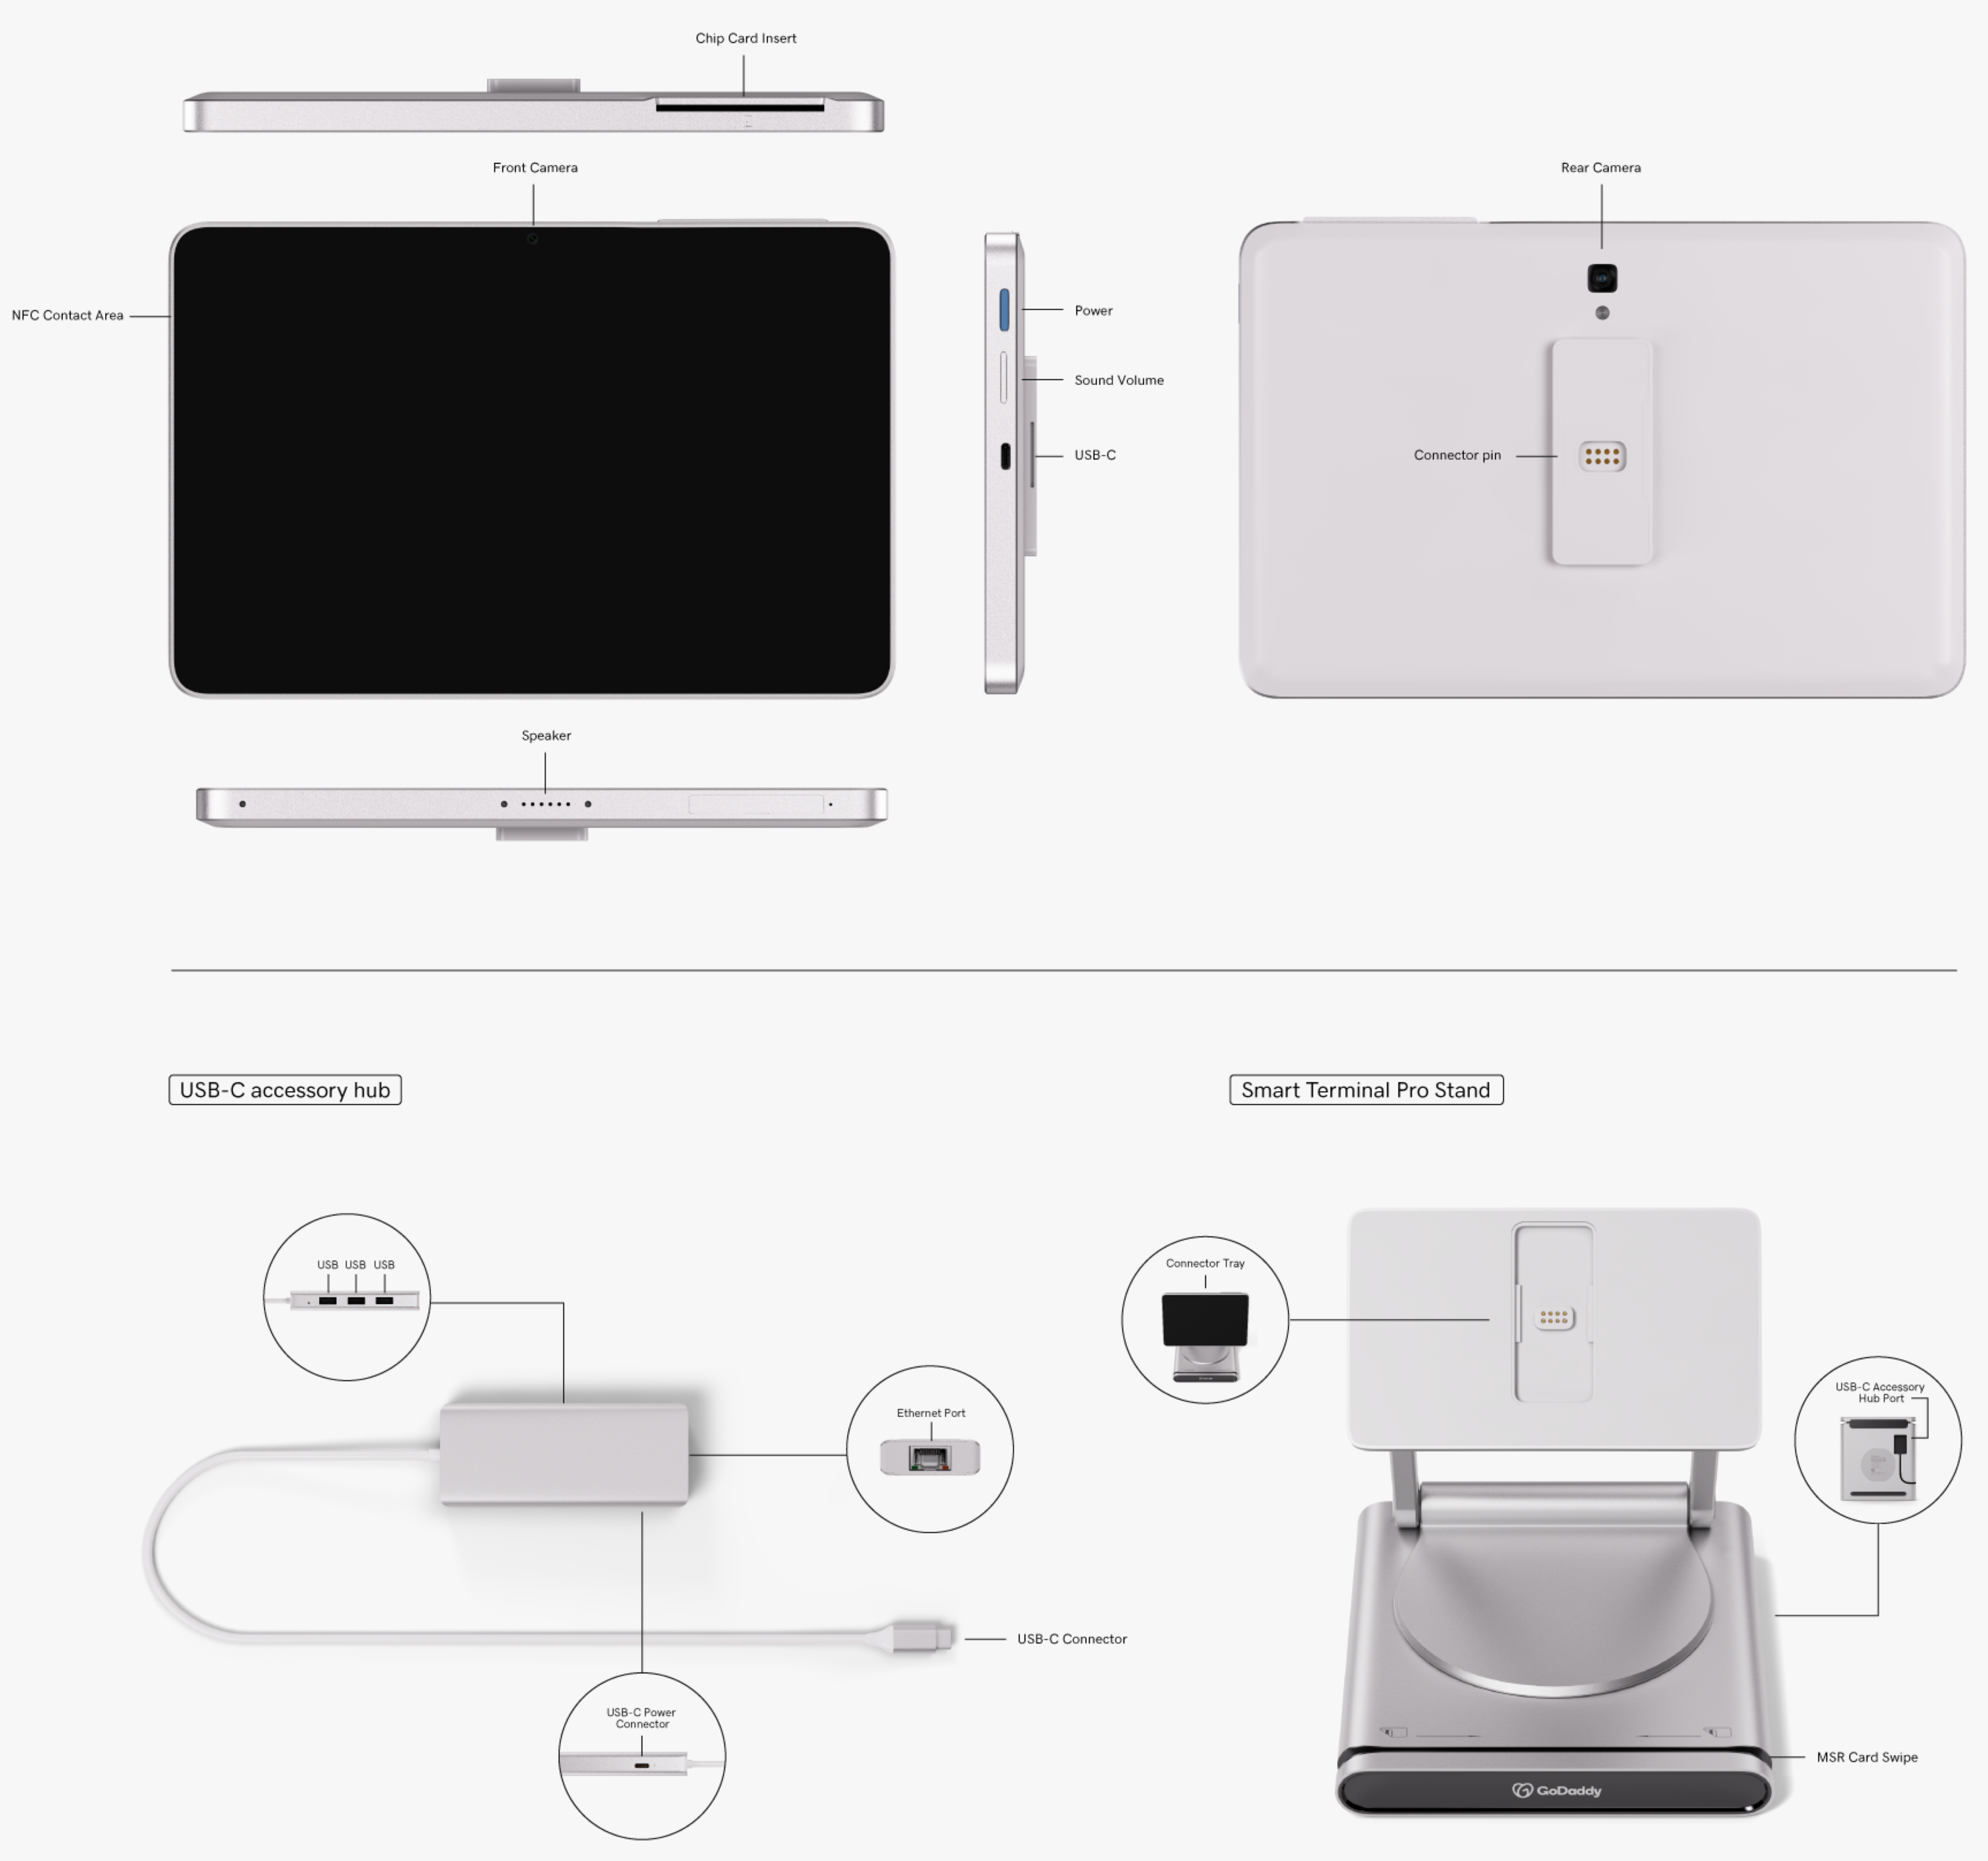
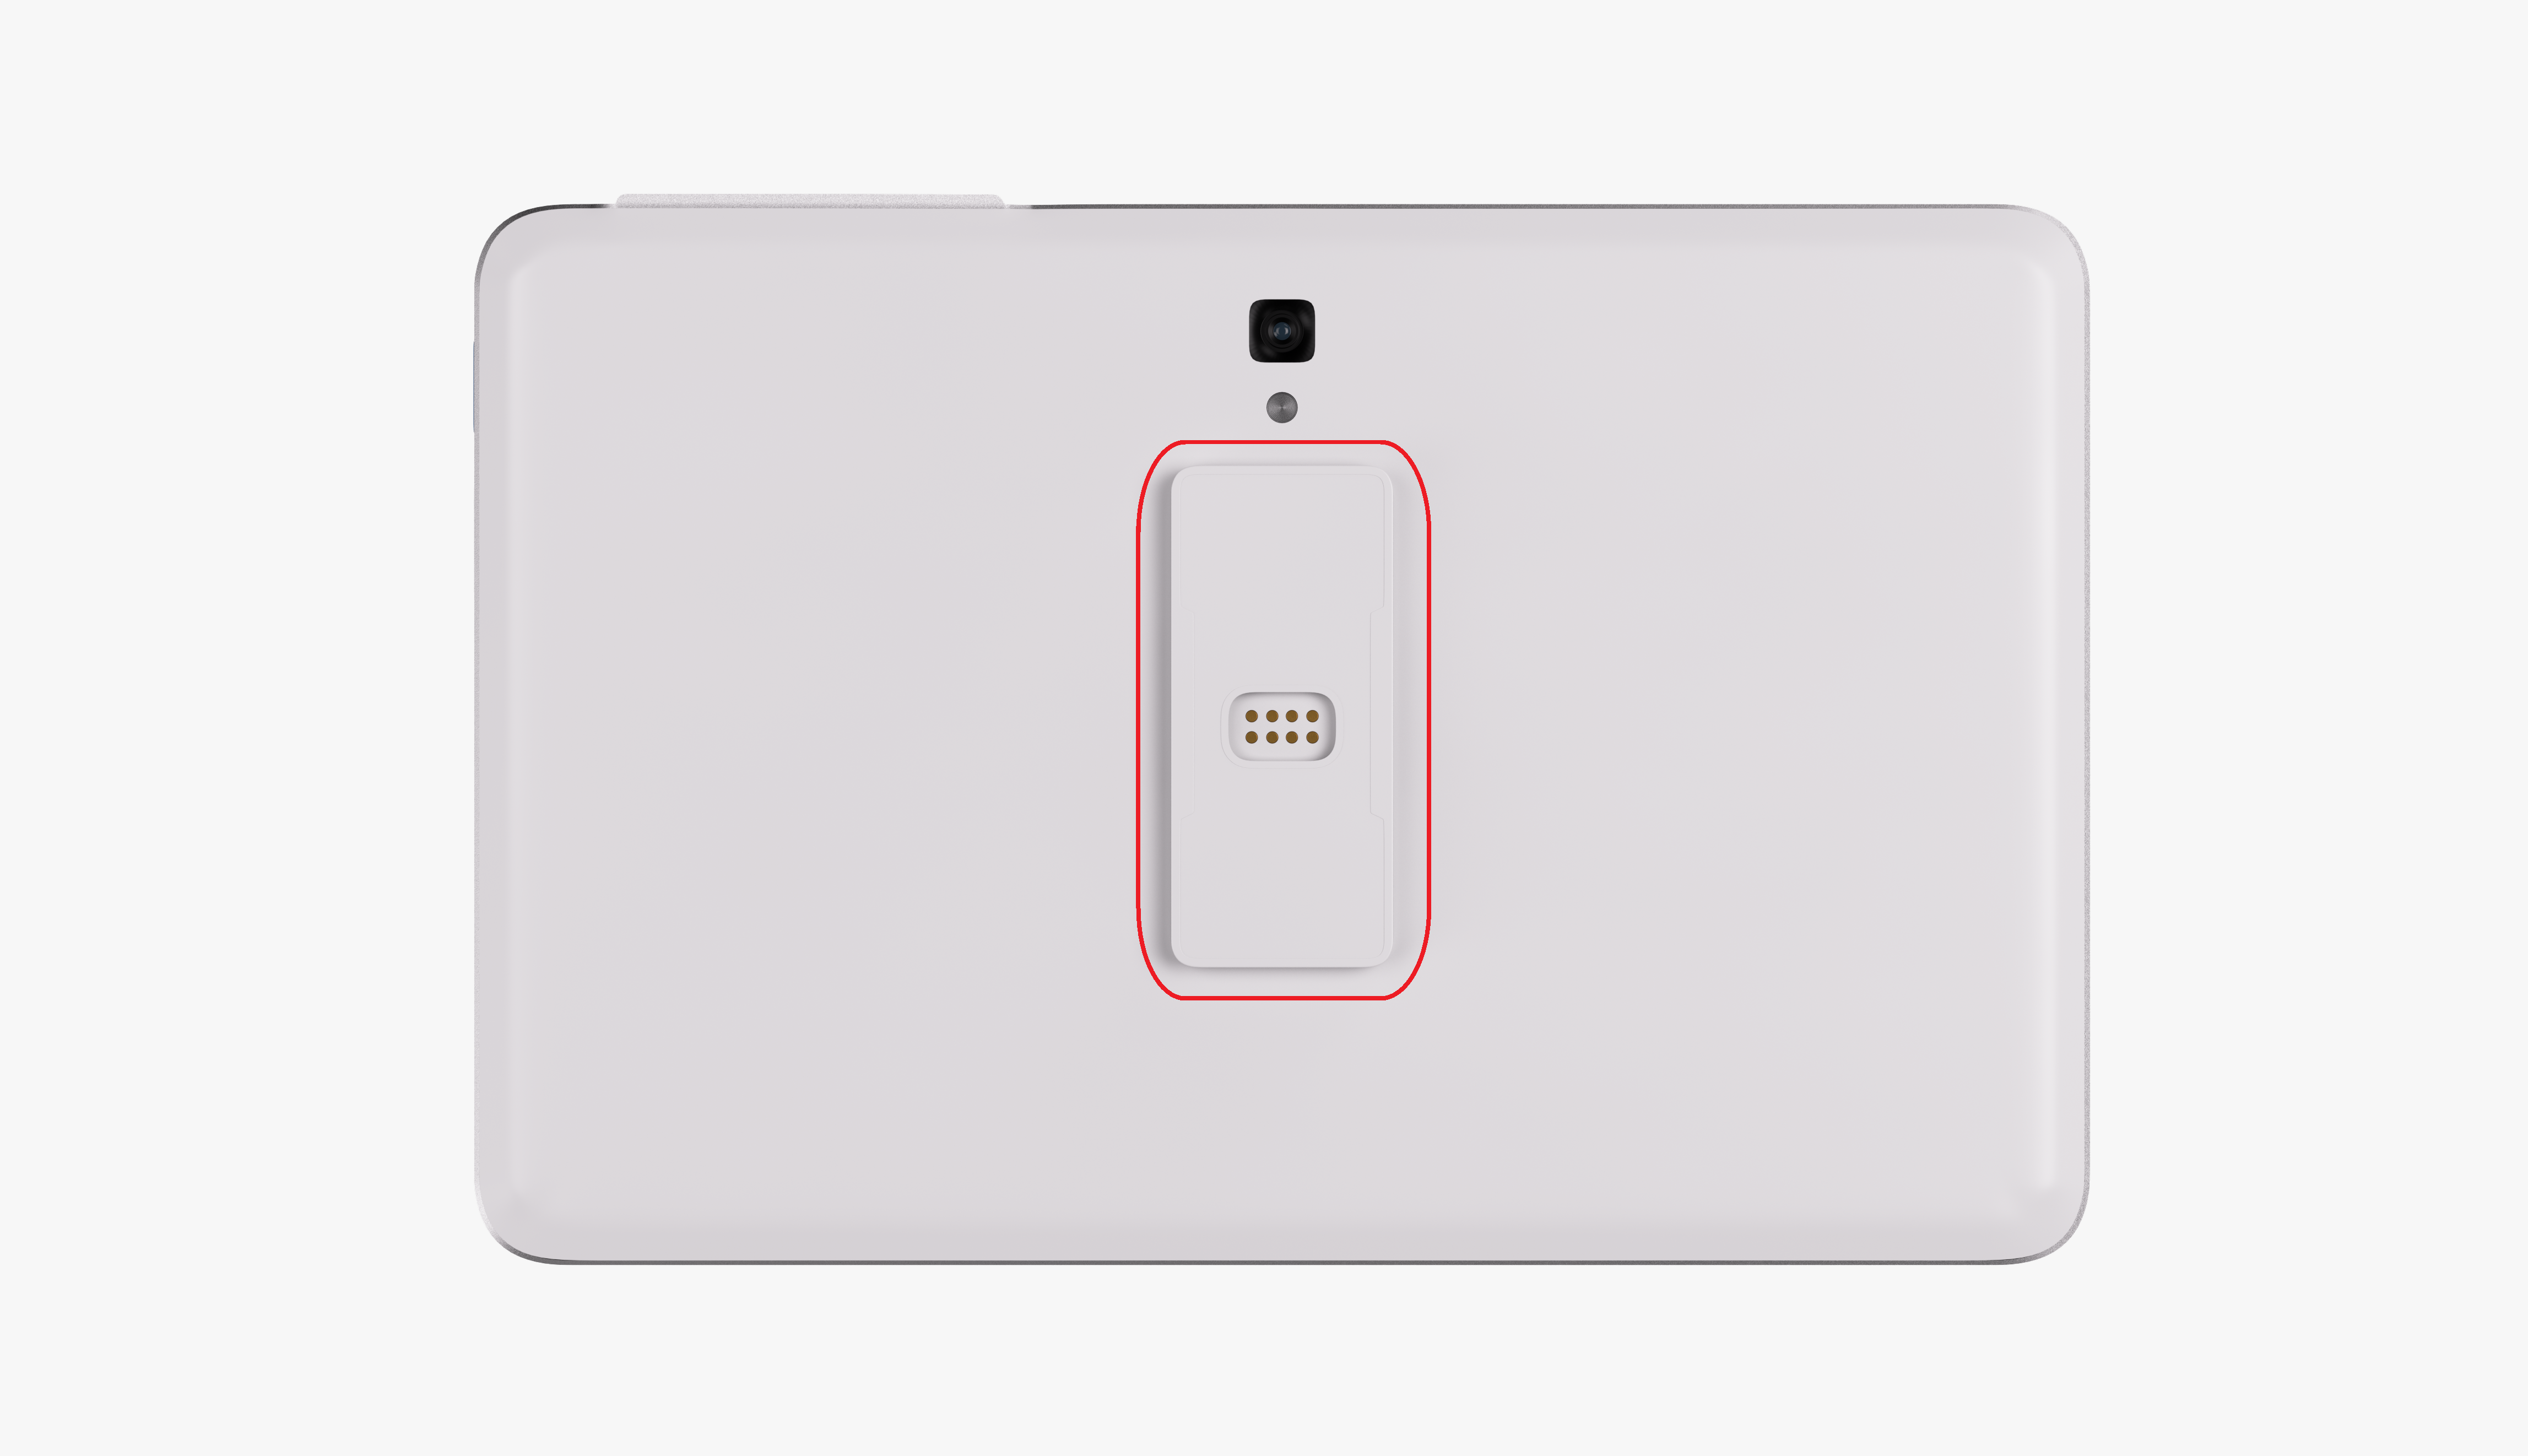
Remove the components from the packaging and familiarize yourself with the different ports and parts of your Smart Terminal Pro. Your Smart Terminal Pro includes a display, stand, accessory hub, USB-C power cable and power adapter. Your customers can insert their card into the card reader slot above the screen, swipe their card on the base of the stand, or tap their card or device on the screen for contactless (NFC) payments. |
| Step 2 |
|---|
|
|
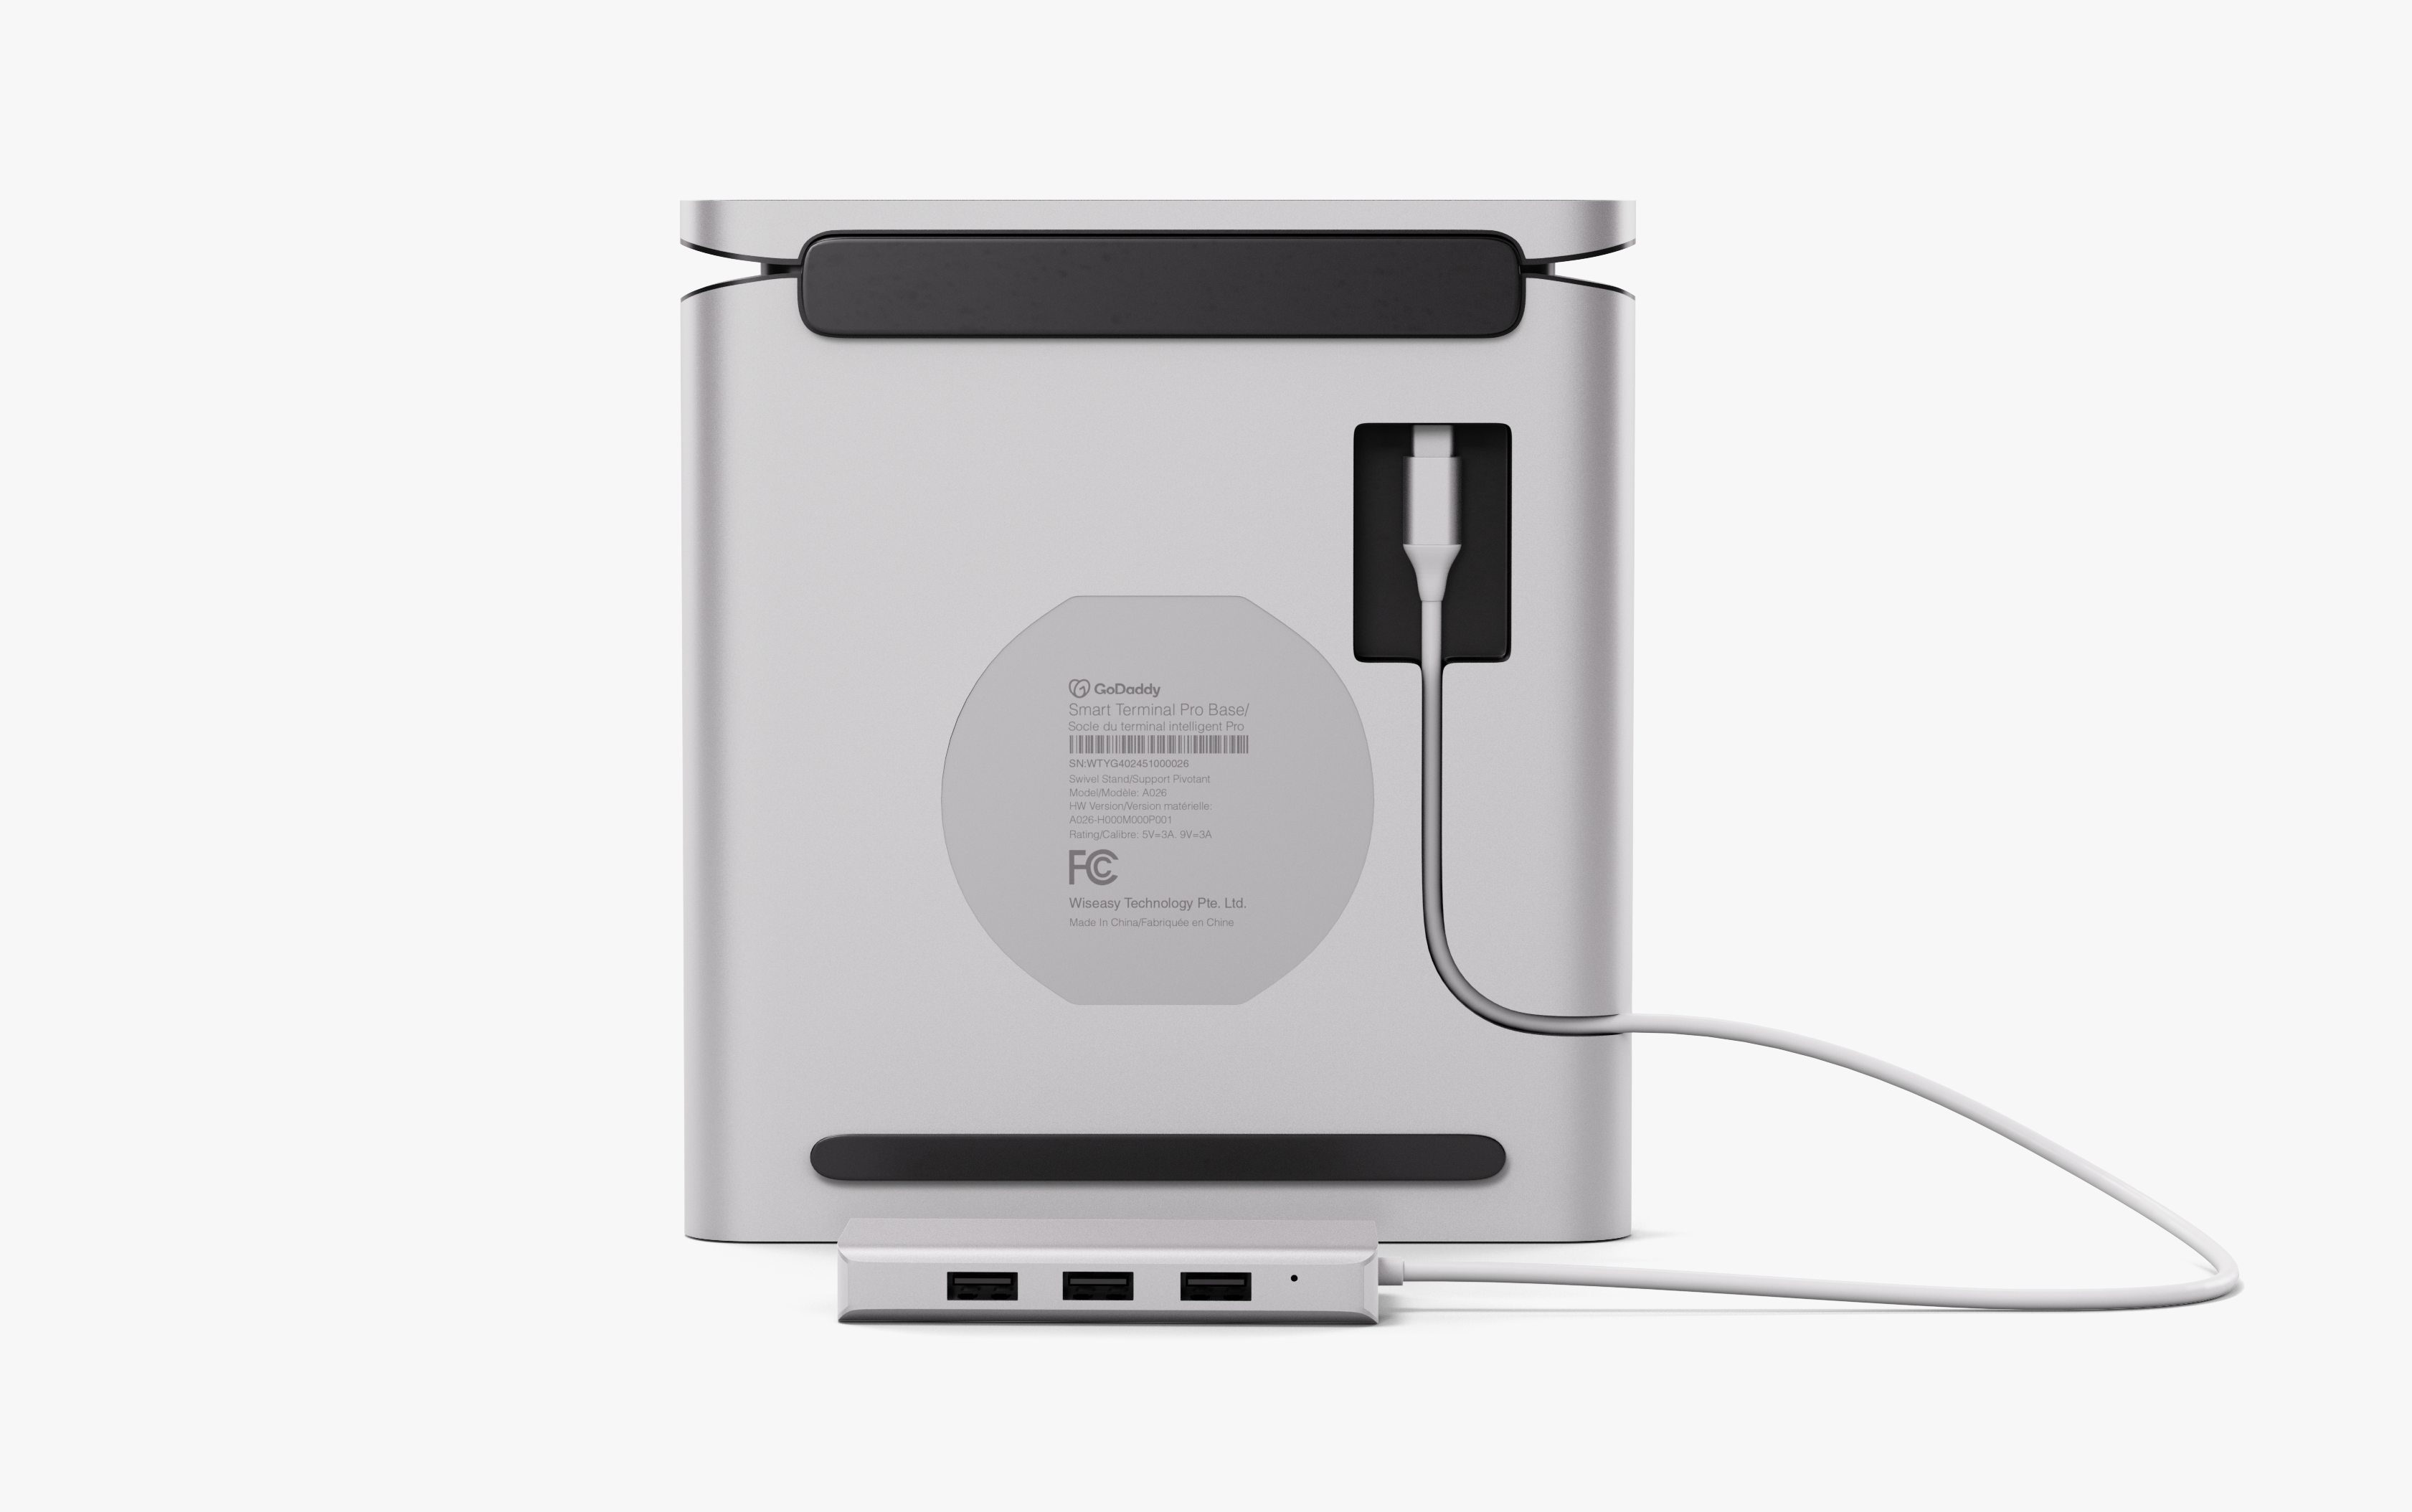
Plug the accessory hub into the port on the bottom of the stand. Press the cord into the groove on the bottom of the stand, so that the cord is flush with the stand and extends from the side. |
| Step 3 |
|---|
|
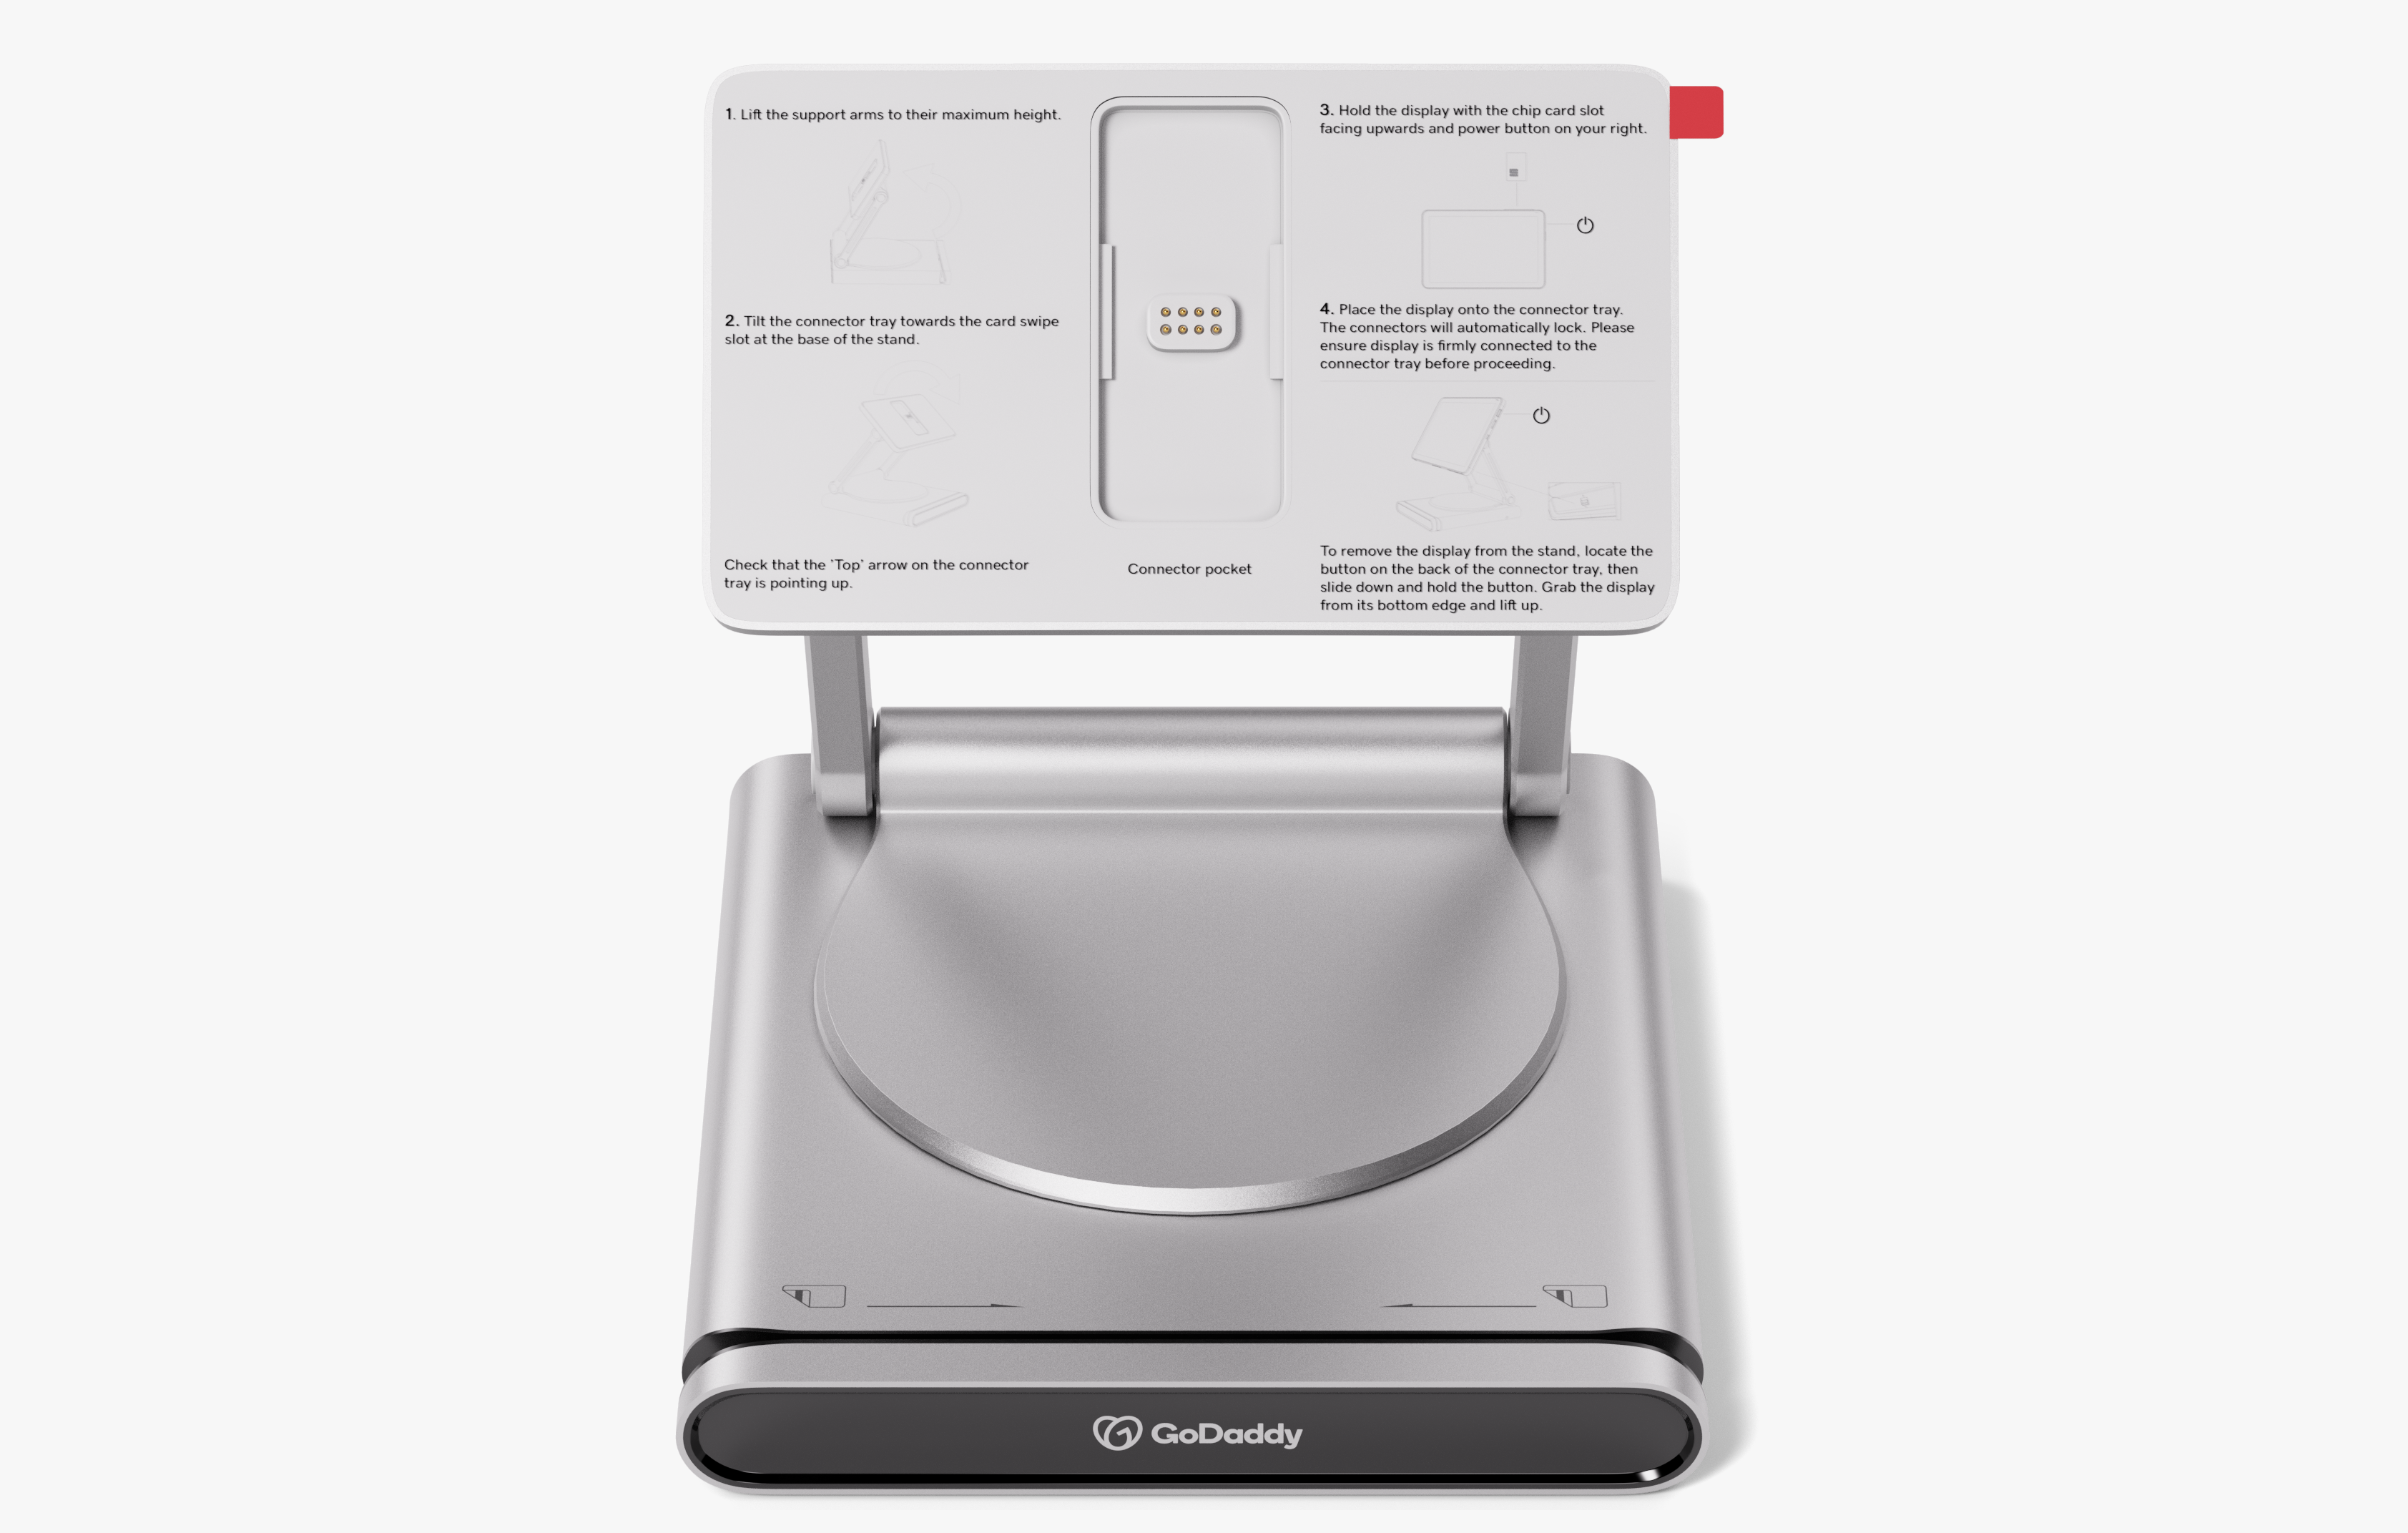
On the stand, extend the arms to their full height and tilt the tray towards the card swipe slot on the stand. Make sure that the top arrow on the tray is pointing up. |
| Step 4 |
|---|
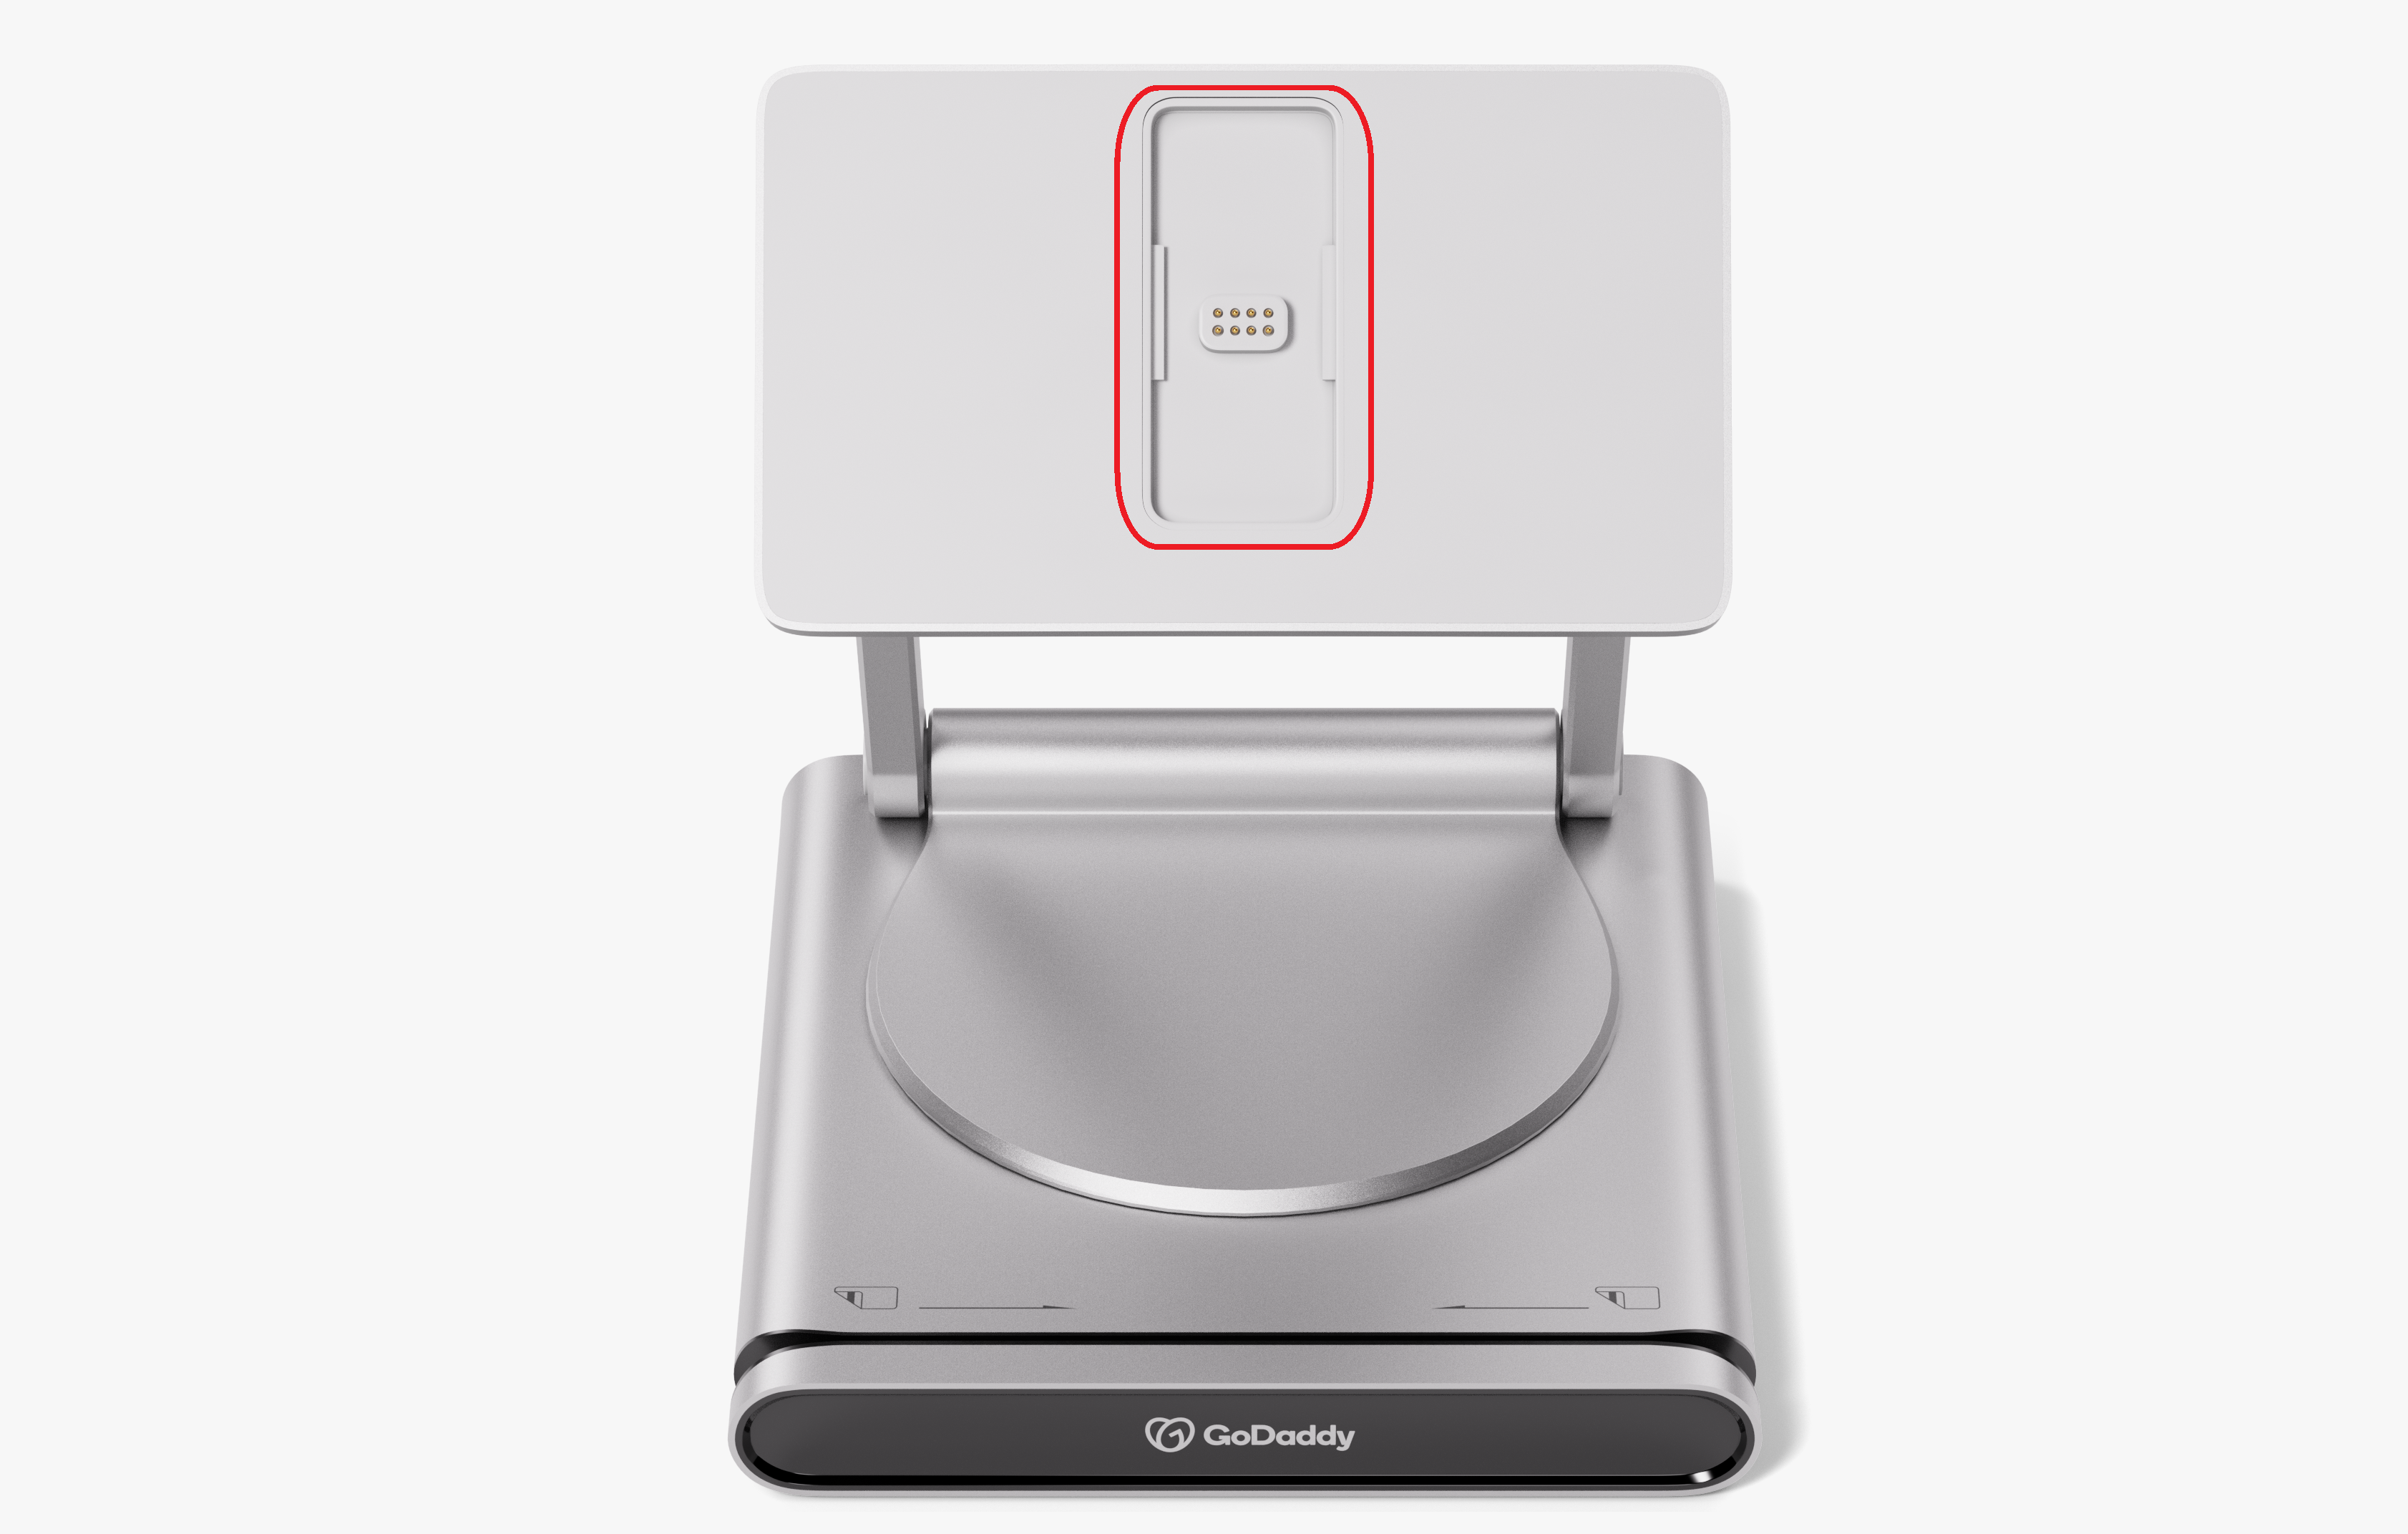  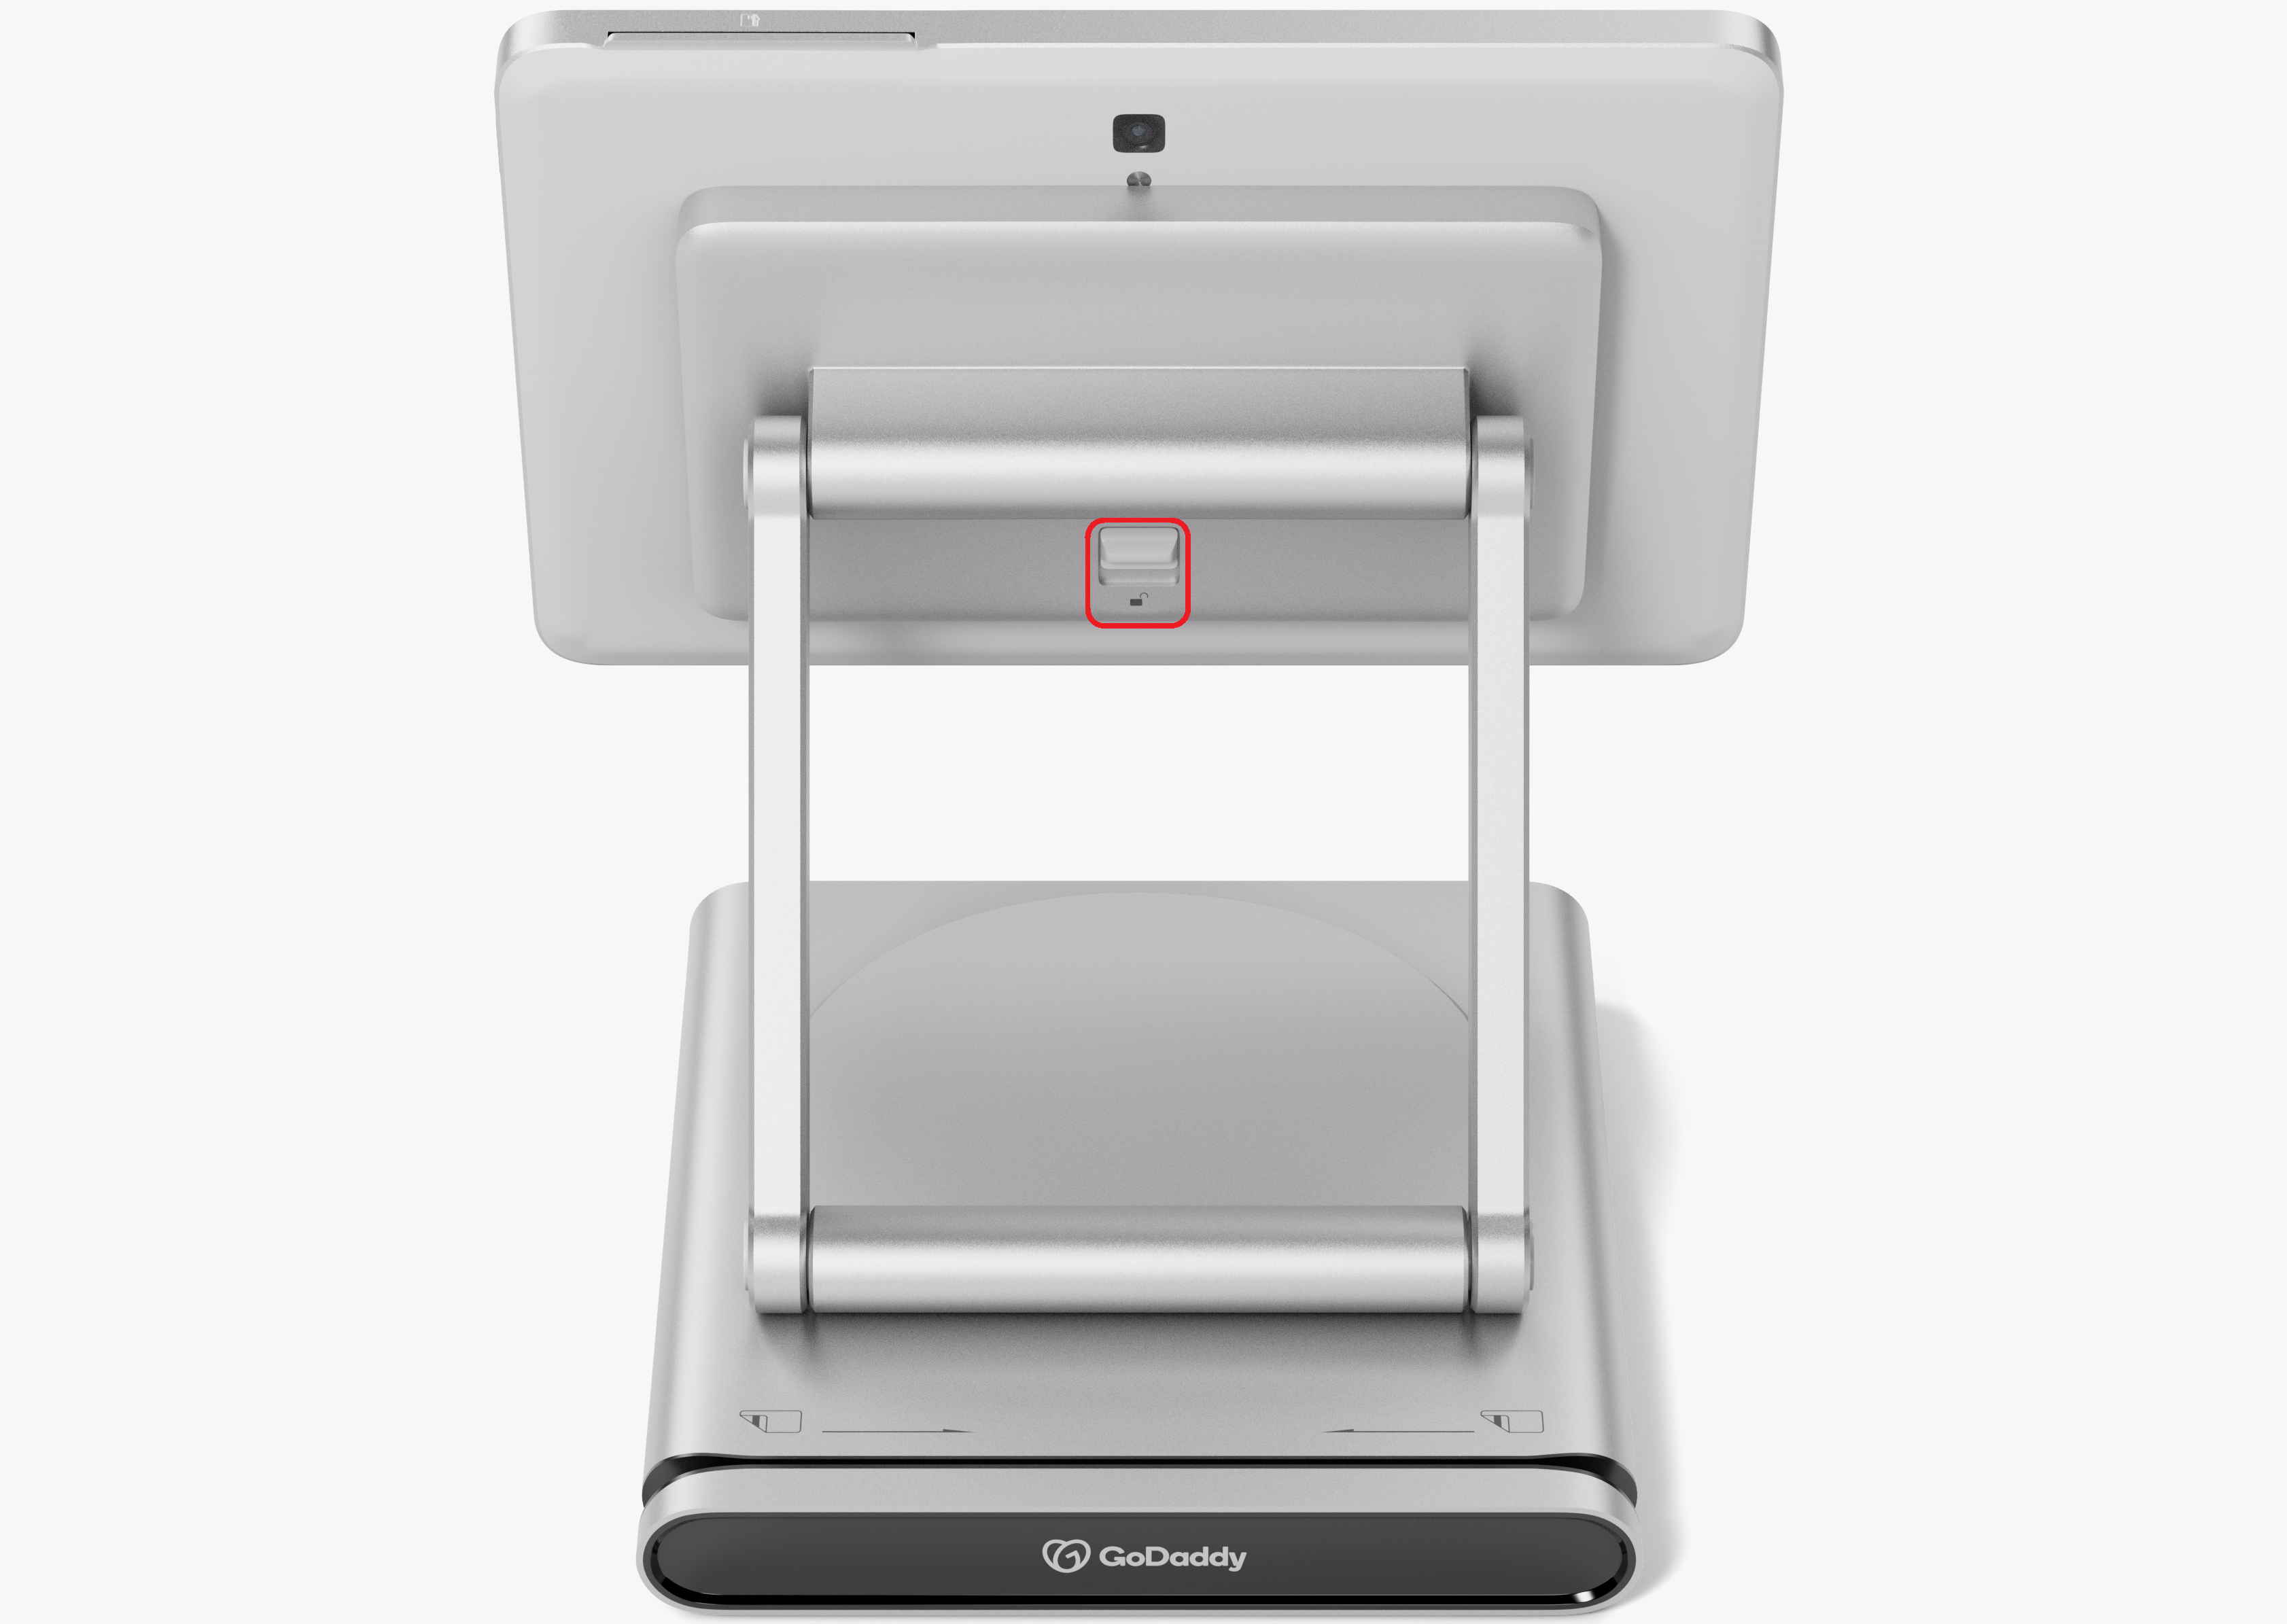 |
Remove the protective film from the display and the tray. Align the connector port on the back of the display with the connector port on the stand and attach the display to the stand, with the chip card slot facing up and the power button on the right. You should hear the connectors lock into place. To remove the display from the stand, locate the release button on the back of the tray. Slide down and hold the button and gently pull the display away by the bottom edge. Your display remains fully functional while it’s detached from the stand. |
| Step 5 |
|---|
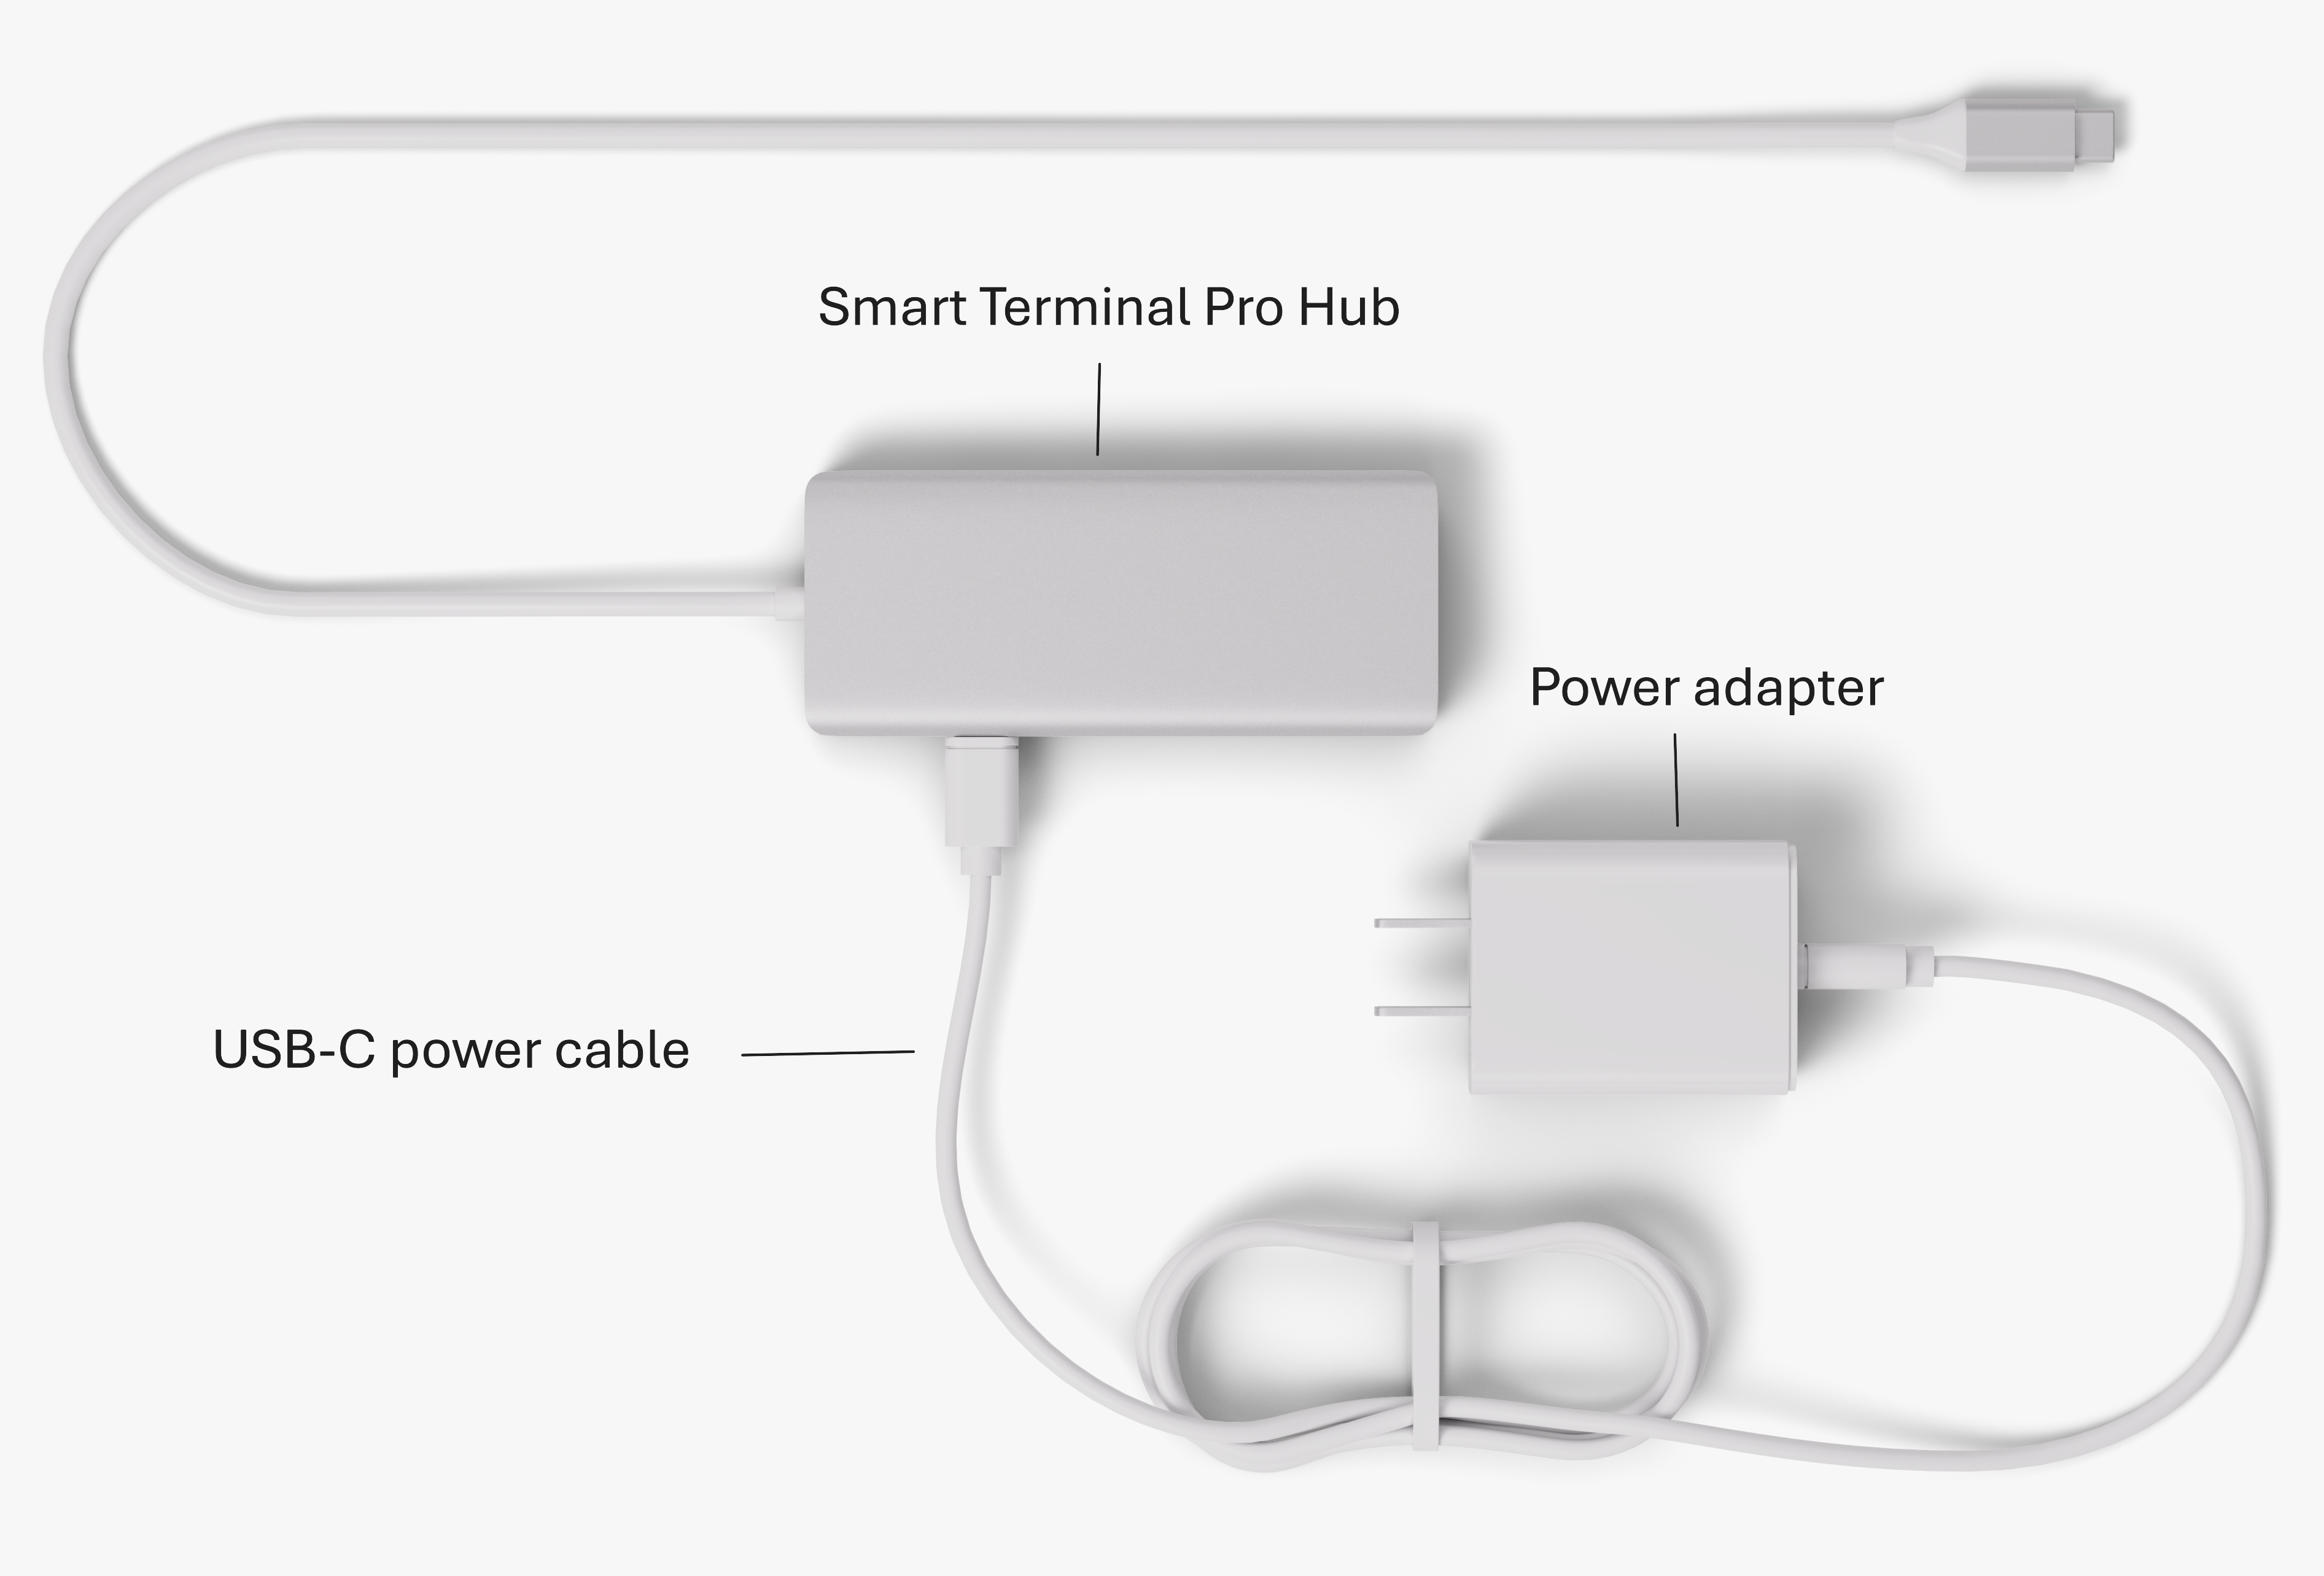 |
Plug the USB-C power cable into the accessory hub and into the power adapter. Connect the power adapter to a power source. |
| Step 6 |
|---|
|
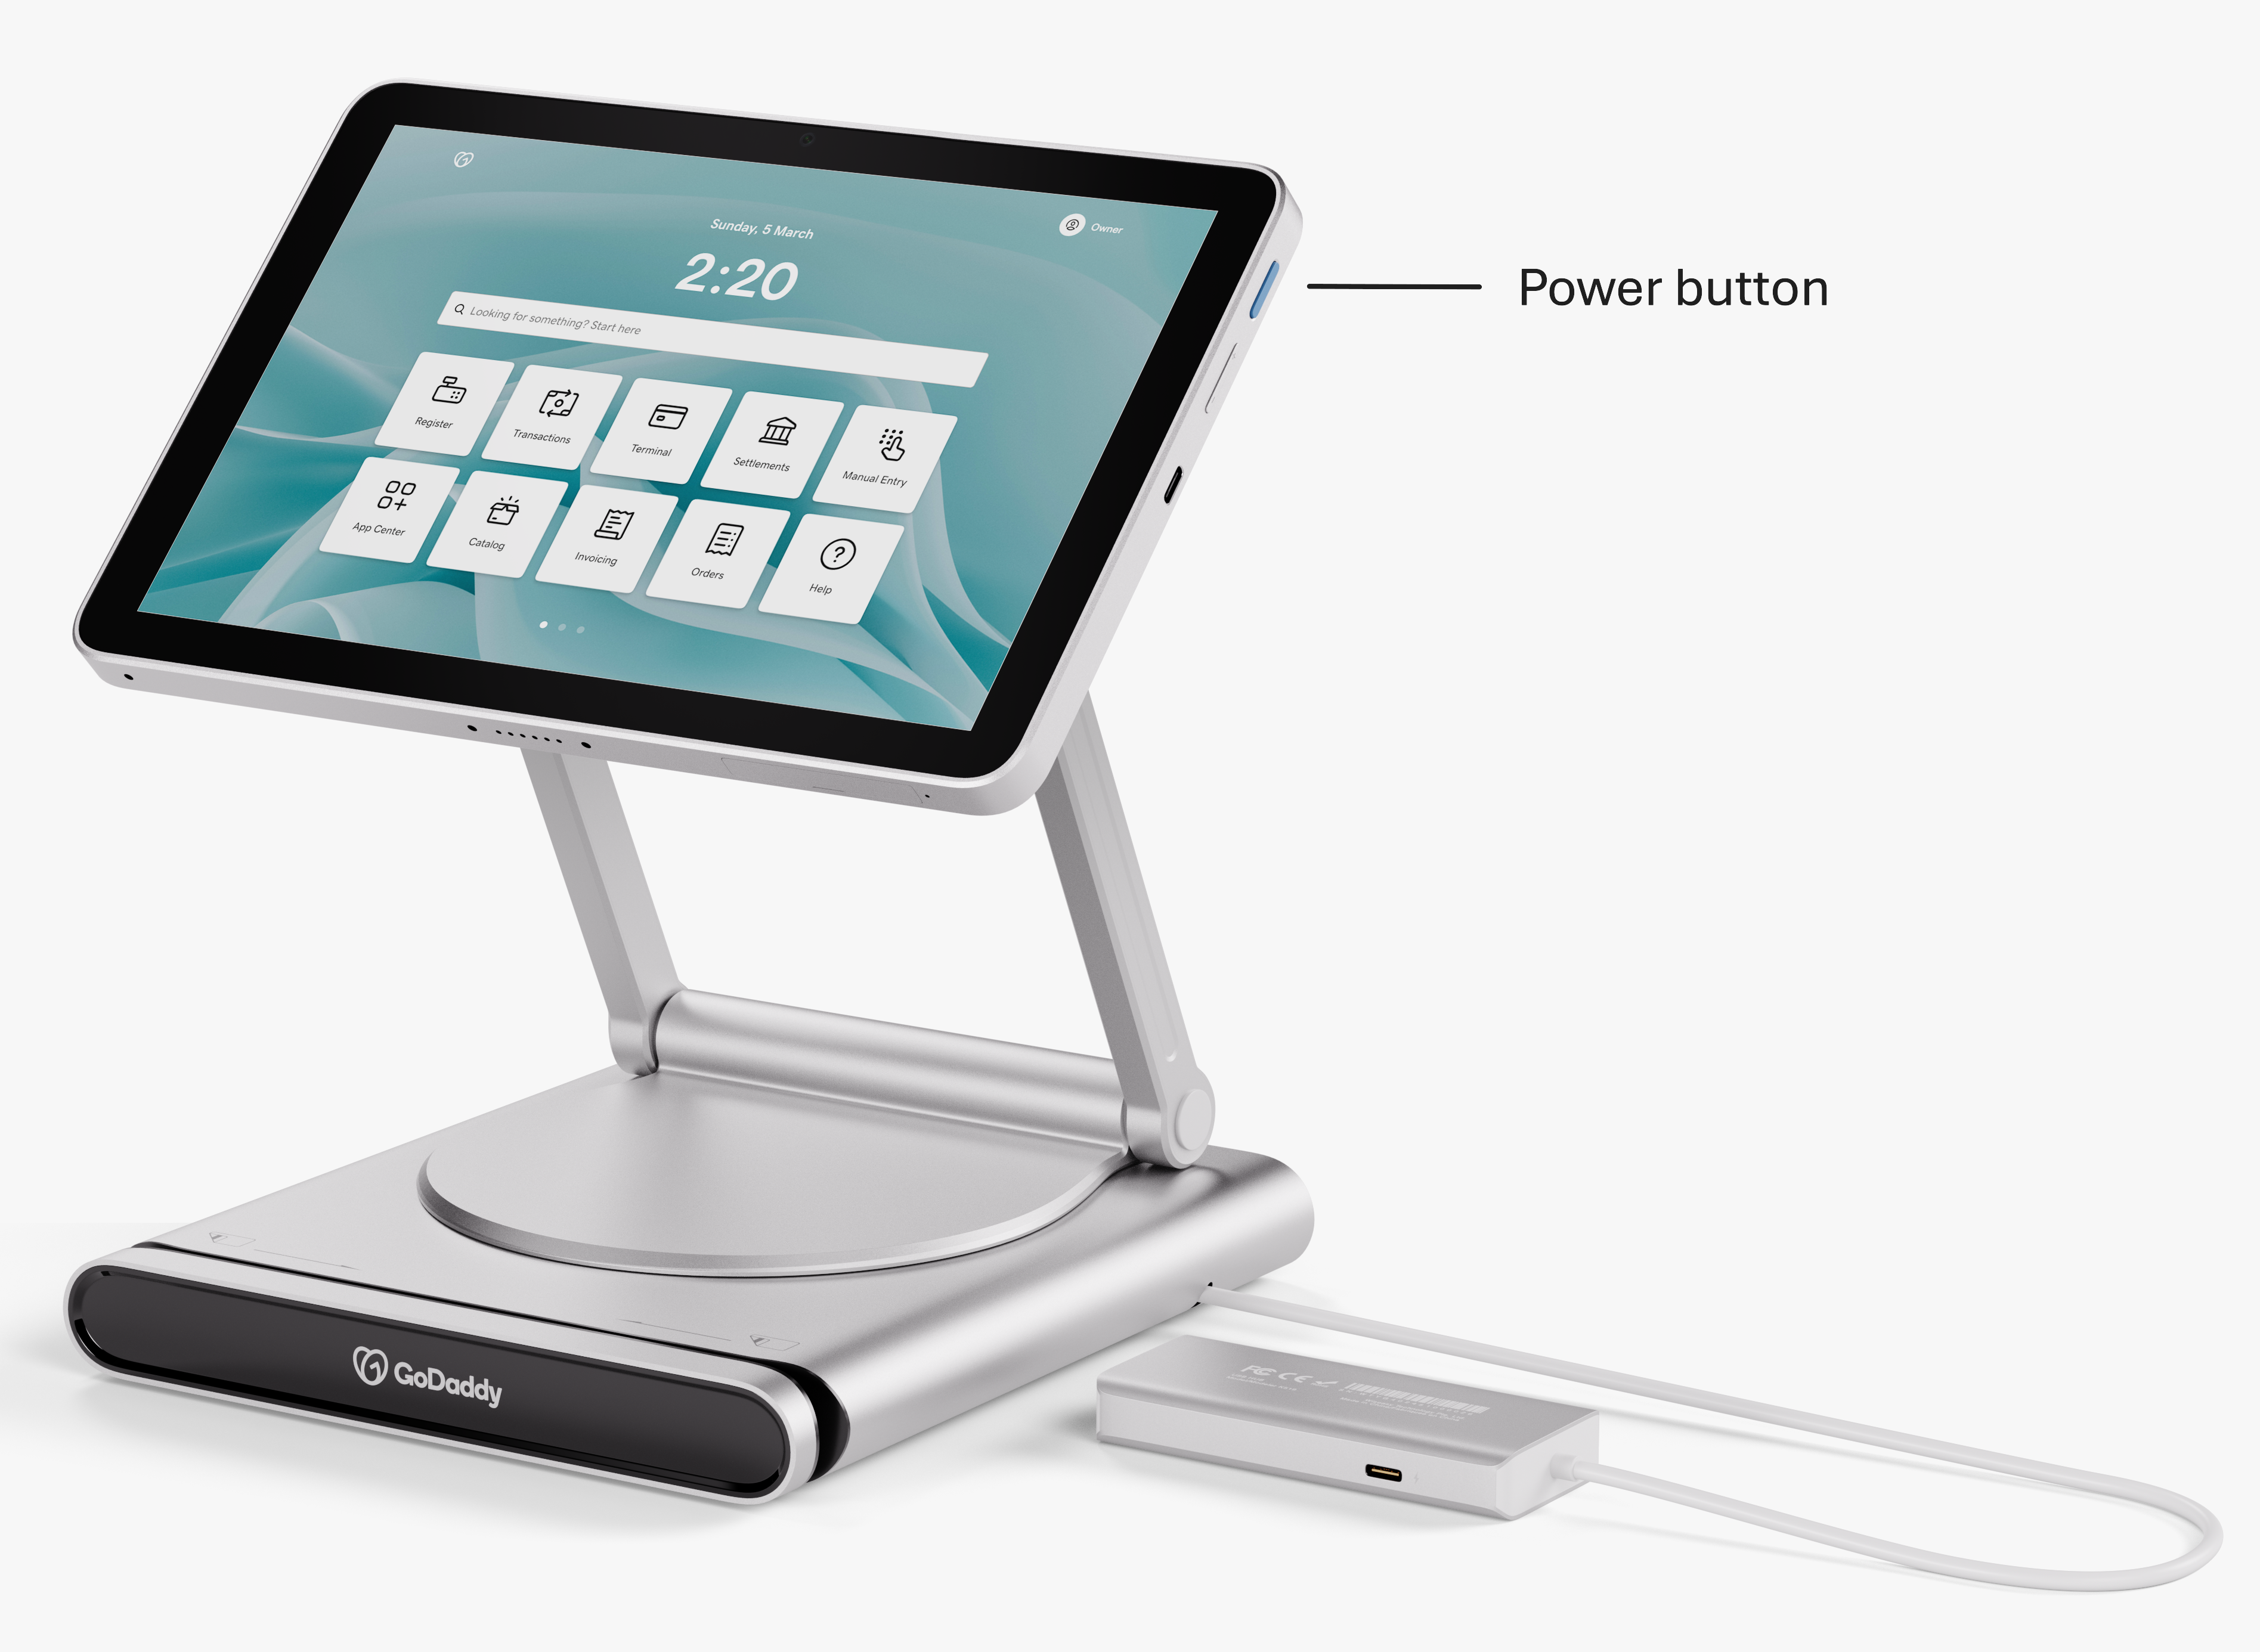
Allow the Smart Terminal Pro to charge for about 3.5 hours. When it’s fully charged, press the power button on the side of your device for three seconds to turn it on and begin the first-time setup. |
More info
- Need more details? Check out our step-by-step guide to set up your Smart Terminal Pro.
- Learn how to set up your product catalog and add products for your store.
- Find out more about compatible accessories for your Smart Terminal Pro.